Peening a European Scythe Blade on a Narrow Anvil
A sharp blade is the key to success in mowing with a scythe.
What is Peening?
A European, tensioned scythe blade is sharpened by first hammering the cutting edge thin on a scythe anvil and then honing the edge with a whetstone. If you could see a cross-section of the minuscule cutting edge of a sharp scythe blade, you would see that it forms a very sharp, slightly curved, chisel-shaped point. As you mow with it, that sharp point gradually gets rounded off. You restore the sharpness of the point every 5 minutes, or so, in the field, by honing the rounded-off edge with a wet whetstone. Eventually though, after a certain number of hours of mowing, the point of the edge gets worn back to where the metal is so thick, that the whetstone can no longer effectively reform the sharp, penetrating angle of that original cutting edge. It can only hone at a steeper, or blunter angle. At this time, the edge must be thinned back out with a hammer and anvil, until it is tapered out and thin enough for the whetstone to be effective again. The process of hammering the metal edge thin is called peening.
Setting up your Peening Stump for a Short Anvil

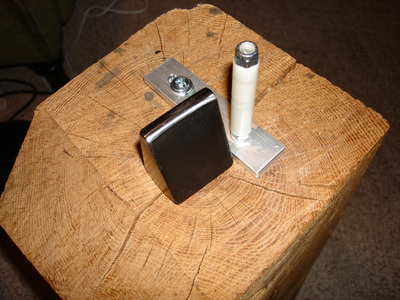
Peening stump and seat
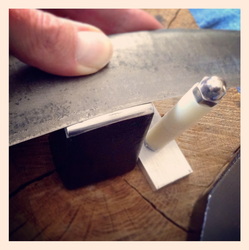
The anvil has a tapered spike at the bottom which needs to be set into a stump, or block of wood. Hardwood is best. If you are using a short anvil (like the anvil pictured), the block or stump that your anvil sits in needs to be at a height that enables you to support the blade, with the top of your thighs, while seated. When peening either end of the blade, you support the opposite end of the long blade with the top of your thigh. This keeps the blade level and supported. Ideally this stump needs to be about 8 - 12 inches in diameter. Your seat needs to be at a height that enables your feet to be flat on the ground, so that you can raise and lower the level of your thigh by raising or lowering your heels. Another stump can serve as your seat. Since the blade is peened upside down on a narrow anvil, you may need to notch out the top of the log that your anvil is in, on the left side of the anvil, to accommodate scythe blades with a higher tang angle.
To mount your anvil into the wood, you need to pre-drill a slightly under-sized hole for the anvil spike. Then insert the spike and pound the top of the anvil with a piece of firewood until it is firmly in place. NEVER USE A HAMMER FOR THIS, as you might damage the anvil surface.
To mount your anvil into the wood, you need to pre-drill a slightly under-sized hole for the anvil spike. Then insert the spike and pound the top of the anvil with a piece of firewood until it is firmly in place. NEVER USE A HAMMER FOR THIS, as you might damage the anvil surface.
Setting up your Peening Stump for a Tall Anvil
Tall anvil peening stump
Tall anvils are nicest when used on a stump, or log big enough for you to sit on as well. The height extends the anvil face up above the top of your thighs. You can then easily support either end of the blade with the tops of your thighs, and the weight of your body helps keep the whole block still. But they can also be used on a smaller wooden stump separate from your seat, like a short anvil. The advantage is you can use a shorter, more common, firewood-length log for a stump, and you don't have to notch out one side of the log to make room for the tang of the blade.
Setting up a Field Anvil
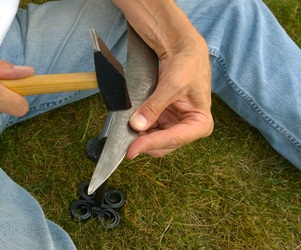
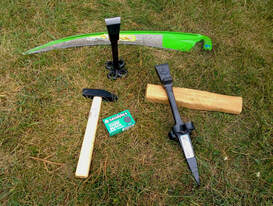 Field anvils have long spikes for sticking in the dirt. The rosette prevents the anvil from going too deep while you are peening.
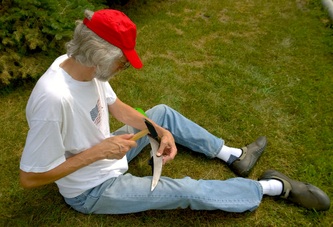
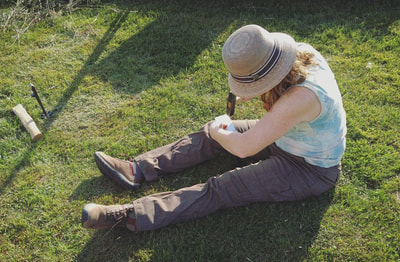
Traditionally field anvils were developed to be carried to remote fields, when mowing all day. They were stuck in the ground during the noon lunch break, and the blades were touched up and peened for the afternoon mowing session. You sit on the ground (it's more comfortable on a slope) with your legs stretched out. You support the blade with one leg or the other, as you are peening. Some scythers prefer peening with a field anvil all the the time.
There is no rebound whatsoever with a field anvil stuck in the dirt. The dirt absorbs too much of the blow, so some of the subtler hammering techniques are not possible, and peening may take a little longer. But it beats lugging a peening stump with you to a remote meadow. This anvil has a small platform, so that you can hit it with the side of your hammer to drive the spike into the ground. Don't drive the anvil into the ground by hammering the anvil face with a hammer. Use the ledge, and the side of your hammer. However, I found that It was much easier to drive into the ground by pounding the anvil on top with my white oak "persuader", which I shaved with a drawknife from a pice of split firewood. The ledge can also be used as a finger rest. Instead of a long tapered square spike, as most field anvils that I have seen, this Rinaldi field anvil has a wide, weed-knife like blade, which is easy to drive into the ground, yet gives great directional stability for the drawing hammer strike..
There is no rebound whatsoever with a field anvil stuck in the dirt. The dirt absorbs too much of the blow, so some of the subtler hammering techniques are not possible, and peening may take a little longer. But it beats lugging a peening stump with you to a remote meadow. This anvil has a small platform, so that you can hit it with the side of your hammer to drive the spike into the ground. Don't drive the anvil into the ground by hammering the anvil face with a hammer. Use the ledge, and the side of your hammer. However, I found that It was much easier to drive into the ground by pounding the anvil on top with my white oak "persuader", which I shaved with a drawknife from a pice of split firewood. The ledge can also be used as a finger rest. Instead of a long tapered square spike, as most field anvils that I have seen, this Rinaldi field anvil has a wide, weed-knife like blade, which is easy to drive into the ground, yet gives great directional stability for the drawing hammer strike..
Hammer Practice
If you are not used to peening, it is good to warm up and practice on the sheet metal strips that are included in your peening kit. See blog post https://onescytherevolution.com/blog/hammer-time-iii-sheet-metal-peening-practice-strips
If you have never used a hammer much before, you can practice by drawing lines with a straight edge, on boards of scrap lumber, and then practice peening on those lines with the cross-peen end of the hammer. Try to "peen" a uniformly deep and smooth line. See blog for more info: https://onescytherevolution.com/blog/hammering-practice
Cleaning the blade
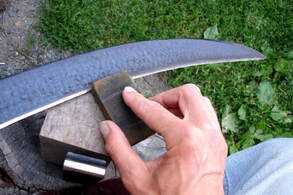 Clean the edge with a rust-eraser.
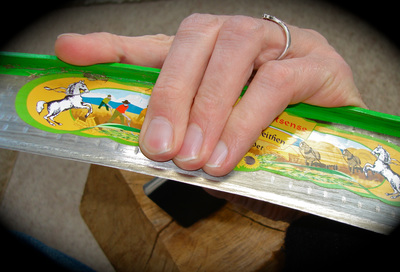
Cleaning the blade is the next step. A clean blade will slide smoothly over the anvil surface, which will make it easier to advance the blade, which will result in more even peening. Remove the blade from the snath. If it is really dirty with plant sap and dirt, I prefer to wash it first. Use a sponge with a scrubbing pad and some dish soap. Dry carefully. Next, further clean the edge of your blade by rubbing both sides of the edge, with a medium-grit, rust-eraser type, A Sandflex sanding sponge is included in your peening kit from me. This removes sap, dirt, and rust, but most importantly, leaves a matte finish on the metal. This matte finish is highly desirable because then, when you strike the edge of the blade with the hammer, the hammer strikes are visible as shiny marks on a matte background. This makes it much easier to tell where you have been hitting, and if you’ve skipped any areas. The hammer marks should join together in a continues line, as you incrementally peen the entire edge of the scythe blade, mm by mm (see photo below). Clean the edge on both sides and then wipe the edge with a rag to remove all the grit and rubber eraser crumbs.
positioning and supporting the blade
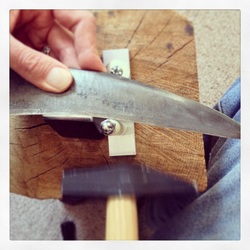
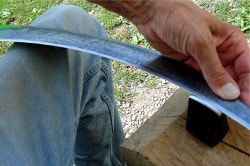 Support the blade with your thigh.
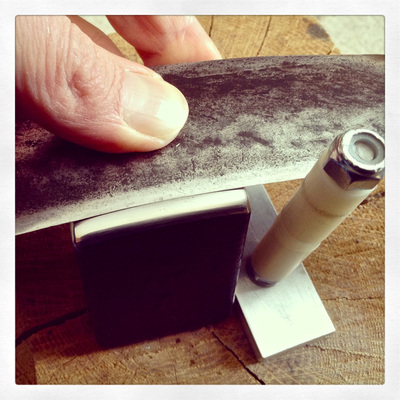
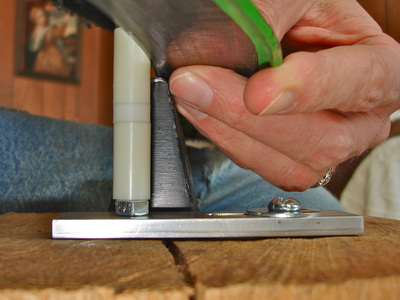
Hold the edge solidly in place by curling your fingers up and under the blade, and grip the blade firmly, and press your fingertips against the back of the anvil. An adjustable roll-guide or guide-roller (Fuehrungs Rolle), can be of great benefit with helping to keep the edge in the correct position on the anvil face. Keep the edge pressed flat and in solid contact with the anvil face. Only strike the edge where it is in solid contact with the anvil face. Support the blade horizontally, with the top of your thighs.
How to adjust the 1SR Roll-Guide
For more info on how to set up and use the 1SR Roll-Guide see the 2nd peening manual.
Hammering Technique 1: The Drawing Hammer Strike
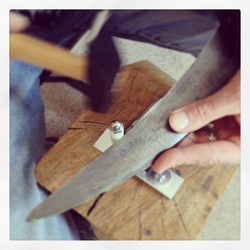
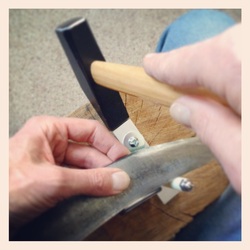
The first hammering technique that I use on a blade that needs a lot of peening, is the "drawing" or pulling hammer strike. You strike the edge of the blade, while pulling the hammer toward you. This draws and thins out a thick edge more quickly then a regular straight downward hammer strike. It has the effect similar to using a heavier hammer, but with less effort. This will take quite a few passes with a very dull blade. One or two passes will do, if you are just touching-up a fairly recently sharpened blade. Otherwise, you repeat until the metal edge is the desired thinness. My variation on this technique is to start at the tip of the blade, and work your way back to the beard. You strike the edge of the blade, drawing the metal of the edge toward you and slightly to the right. Your arm is held so that your forearm and upper arm form a 80-90 degree angle, and you swing it from the shoulder joint in a direction that is at an approximately 55 degree angle to the blade.
Good form with your hammering motion, is very important in order to achieve precise results. For the “Drawing “ hammer strike, you keep your upper and lower arm at a nearly right (80 degree) angle, wrist and elbow joints held fixed (but responsive. Not exactly rigid or locked.), and you swing from the shoulder joint. Imagine that your shoulder joint (the glenohumeral joint to be precise) is a ball-joint from which your L-shaped “mechanical” arm swings. By isolating the motion to just one joint, much greater precision is possible with your hammer strikes. Over time you can become less rigid and more fluid, but it is good to start out with a very controlled form to insure optimum accuracy as you are learning. See my video below:
Traditionally this "pulling" strike is done straight on, and from beard to tip. You hold the blade on the anvil with your left hand, and guide the blade, incrementally, mm by mm, until you've peened the entire length of the edge.
The blade edge is kept at the top of the radius, slightly (just a hair!) past the very center toward you. If you go too far forward, you end up with too much of a "hollow ground" shape on your edge, and it will curve too much, and be very weak. Avoid that. Hold the edge solidly in place by curling your fingers up and under the blade, and grip the blade firmly, and press your fingertips against the back of the anvil. I also like to rest my left forearm on the blade (whenever there is room), to keep the blade in solid contact with the anvil face. Since with the “Drawing” strike, you are gradually drawing out the metal at the edge by only hitting the very edge with the hammer, you have to gradually “draw” the metal out with successive passes on the edge. The thicker that the metal at the edge is to start with, the more passes you will need to do. Therefore, it is much less work (both in terms of mowing performance, and in terms of peening), to touch up your blade often, rather than waiting until it is really dull. There is a German saying, “Gut gedengelt ist halb gemäht!” ( “Well peened, is half-mowed! )”
I prefer to do the pulling strike at a slight diagonal. My own variation is to start at the tip of the blade, and work my way back to the beard. The advantage of this is that it's easier to smoothly guide the edge of the blade over the anvil face, incrementally, mm by mm, from left to right, in (almost) the same direction that the hammer is slightly pulling the blade with each stroke.
When working from beard to tip with a diagonal stroke, you get a slight “back-and-forth" (ruck-zuck) motion of the blade on the anvil. The hammer is slightly pulling the blade to the right, while you are moving it back to the left. You have to keep moving the blade back in the opposite direction that the hammer is slightly pulling the blade. This makes it harder to keep the blade in position. I say, "go with the flow". This "flow" actually enhances my ability to feed the blade steadily, from left to right with the fingers that are holding the blade, as I am striking the edge with my hammer. I get a better coordination between each hammer strike and advancement of the blade, by striking at a slight diagonal.
“Diagonal Drawing Hammer Strike” Technique - Start at the tip of the blade, and work your way back to the beard. You strike the edge of the blade, drawing the metal of the edge toward you and slightly to the right. Your arm is held so that your forearm and upper arm form a 80-90 degree angle, and you swing it from the shoulder joint in a direction that is at an approximately 55 degree angle to the blade.
See my video above to see the hammering form. See the video below to see a close-up of the hammer strike.
2. The "Finishing" Hammer Strike
The next hammering technique that I use I now call the "Finishing Hammer Strike“, (a.k.a. the “Topping Blow“ in the U.K., the “Klopfender Dengelschlag“ in Germany-Austria). Once the metal at the edge is the desired thinness/sharpness, you make the final pass or passes, with a straight-on and straight downward (no pulling) hammer strike. This further tapers out the edge, and work-hardens the metal. It gives the blade a thinner yet very tough, cutting edge.
(Note: This two hammer strike peening method is a variation of a traditional European peening method, I learned of it via Bernhard Lehnert's book on Peening called Dengeln. It was once thought that the drawing hammer strike stretched the metal out, and then you needed to "pack" it back down to make it denser, and strengthen it back up. With modern science we now know that the cold steel can neither be stretched out, nor made denser. The only thing that the cold hammering is doing is displacing and work-hardening the metal. Whatever is going on at the microscopic level, this peening method is very effective. I think the drawing hammer strike focuses the force of the hammer more toward the thin side of the bevel, and enables you to peen out the thick metal faster than with just a straight down hammer strike. However, I suspect it also gives the very edge a very minute, thickened bead or lip, which needs to be honed away to get to the final sharp edge. By finishing the edge with a straight down hammer strike, I think it tapers out this "fat lip" as well, resulting in a more fully tapered out, and further work-hardened point. I find I need to hone less initially, and can use a finer stone, if I finish the edge after the drawing hammer strike with a straight down hammer strike. And I get a fantastically sharp edge.)
Before you do the final passes, rub the side of the edge that you will be hitting with the hammer, with the rust-eraser sanding block each time, so that you can see the new hammer marks that you make. Wipe the edge clean of grit with a rag. Then start peening at the tip, and work your way incrementally, mm by mm, to the beard. This time place the edge at the very center of the top of the radius. This will give your edge the sharpest point. Instead of drawing metal forward with this hammering technique, you are giving it it's final point by hammering straight down on it, and also work-hardening the edge even further at the same time. You hit the edge in exactly the same place as before, but with a straight down hammer strike. For this hammer strike, your wrist and shoulder joints remain fixed (but responsive), and the motion is isolated to your elbow joint. Imagine that your forearm is the rigid arm of a mechanical trip hammer, and your elbow is the hinge it operates from. Great accuracy and consistency are possible this way.
Working with the Rebound
Once you are proficient with the accuracy and consistency of your downward hammer strike, you can work at accelerating your rate of strikes and getting in time with the rebound, for a faster and more powerful peening strike. See video below:
Peening by staying at the edge
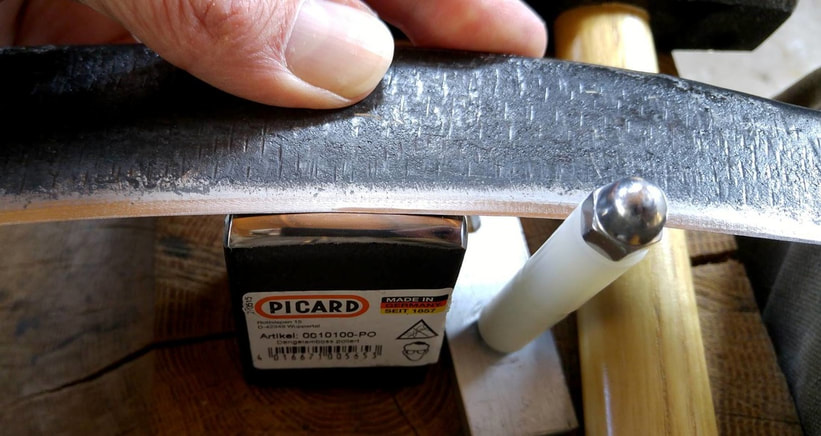
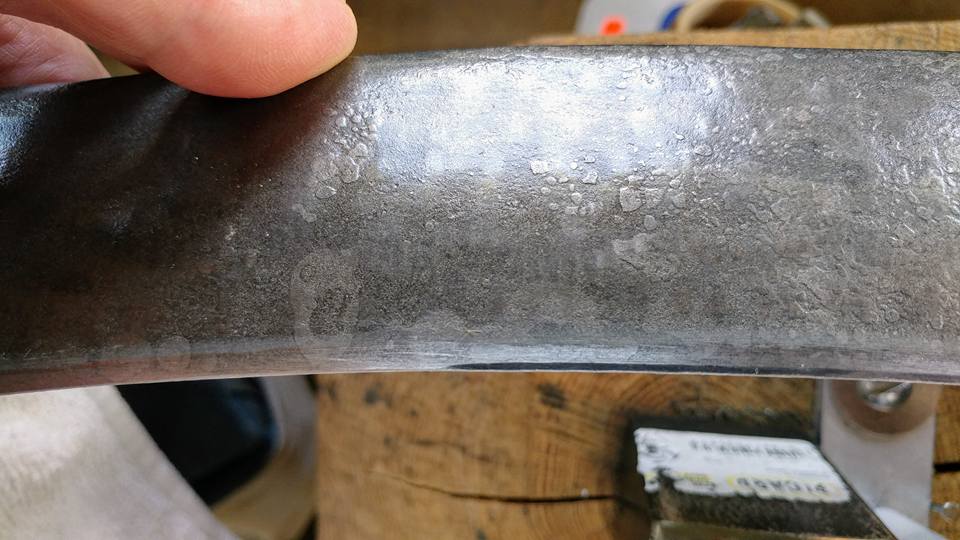
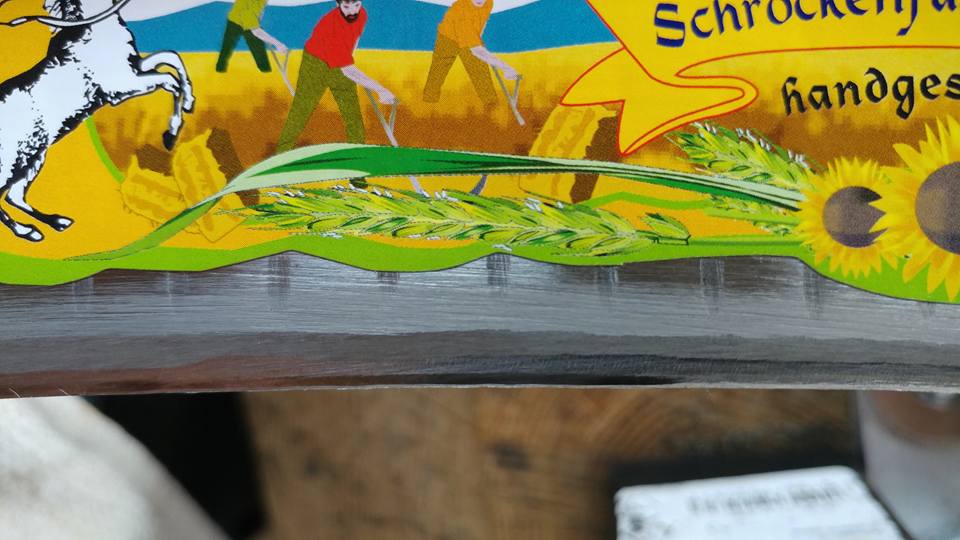
In the photos below you can clearly see a well executed first pass in progress, back and front view, on a new Fux Gartensense blade.. The matte finish made by the rust-eraser makes the shiny hammer marks clearly visible. Notice the amount of metal being moved forward and tapered out by the narrow anvil and hammers strikes, and that the hammer strikes are so smoothly overlapped that it forms a solid shiny line. This is what good peening looks like. Unless the primary bevel is really worn back, like on an old blade, there is no need to peen a line in from the edge. Successive passes at the edge keep further tapering and thinning out the edge. Continue to make passes until it reaches the desired amount of thinness. More for lawns, less for big weeds.
The Thumbnail Test
Step by Step Review
1. Clean blade and anvil - Remove blade from snath, and clean it. If it is sticky and gritty with plant saps and dirt, wash it with dish soap and a scrubbing pad. Dry carefully, and thoroughly. A clean blade will slide smoothly over the anvil surface, which will make it easier to guide and peen evenly. Keep the anvil surface clean as well. Use the rust-eraser and/or a scrubbing pad to clean anvil face.
2. Create a matte finish - Create a matte finish on the edge that you are going to peen, by rubbing it with the rust-eraser, rubber sanding block, before each new pass.
3. Diagonal Pulling Hammer Strike - Do 2-3 passes from tip to beard. Hold arm so that upper and lower arm, together form an 80 degree angle. Isolate motion to the shoulder joint. The hammer strike draws the metal out toward you. Work your way mm by mm, down the entire length of the blade, from tip to beard. The hammer marks should join together in a continuous line.
4. Finishing Hammer Strike - Do 1-2 passes from beard to tip. Isolate motion to just the elbow joint. Imagine that your forearm is the arm of a mechanical trip hammer. The hammer strike is straight down, and it further thins and hardens the cutting edge. Work your way mm by mm, down the entire length of the blade, from beard to tip. The hammer marks should join together in a continuous line.
5. Final honing - Hold the blade by the tang, and place the tip in a stump. Brace the hand holding the tang against your body, with the cutting edge facing away from you. Hone from beard to tip, with a wet whetstone. Use the shape of the whetstone to feel for the correct angle that you need to hone the edge. Too steep, and you will dull the edge; too shallow, and you will not be doing much of anything. Use a fairly light touch, and let the stone do the work. Experienced peeners can skip this step, and just hone the blade like they do in the field.
Botan Anderson © 2008 © 2018
www.OneScytheRevolution.com
For more info see the manuals on my 1SR Peening Manuals webpage.
