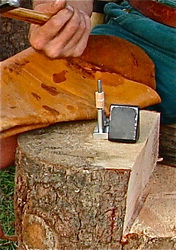
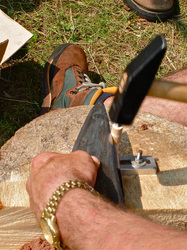
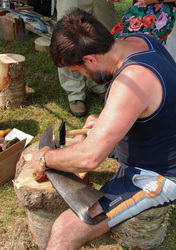
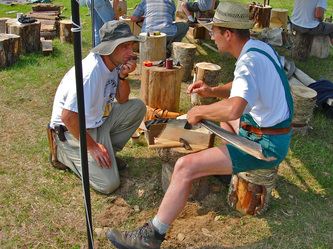
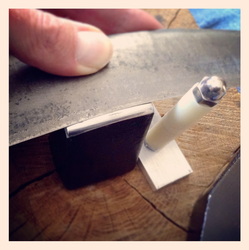
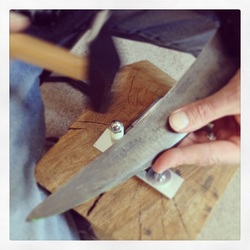
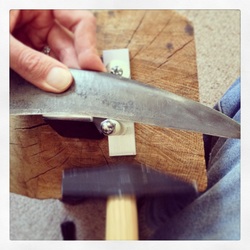
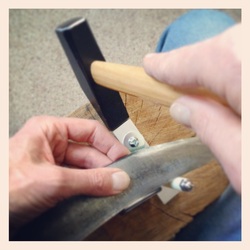
 Just got these peening guides back from our local machine shop. I spent many hours over the past couple of weeks, in hardware stores trying out all kinds of combinations of aluminum bars, and nuts, bolts, washers, and spacers, until I finally came up with a combination and design that worked. Then I had a local machine shop cut the aluminum pieces, router out the slots, drill and thread the screw hole, and chamfer all the edges. They did a beautiful job. The finished product is sleek, and works wonderfully. 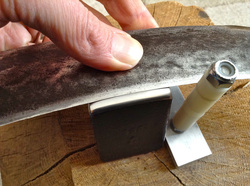 Known as a "Führungsrolle" (guide roller) in German, they were commonly fashioned with a nail hammered through an empty sewing thread spool, on your peening stump. They help hold your scythe's edge properly on the anvil face, as you hammer it. The problem with the sewing spools on a nail, however, was that you could not adjust them very easily. This is especially needed when peening around the more curved part of certain blades like our 2010 Haying blades. 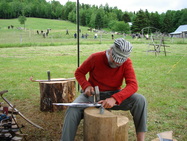 My first encounter with these "Fuehrungsrolle" was at the 2006 International Scythe Symposium on the Vido farm in New Brunswick, Canada. One person there, had a "guide roller" that was made of a plastic pipe, set over a long gutter nail, with it's head hacksawed off, that was nailed into the stump. Similar to the spool-on-a-nail guide roller, that I described earlier. It worked ok, except that it wasn't adjustable.  Niels Johansson discussing peening with "Tinker". Niels Johansson discussing peening with "Tinker". The other person that had a "guide roller" was Niels Johansson of Denmark. His website is www.legrej.dk , (He was later promoted to "Mower of the Decade" by Peter Vido.) It was also homemade, but a bit more sophisticated in that it was adjustable. It had a threaded rod, with a metal spacer, and then a center-drilled, wooden dowel for a "spool" on top of that, to guide the edge of the blade. It was mounted on a short and thick metal bar, with a slot cut into it. It was attached to the stump with another threaded rod and a washer & nut, screwed down into a wall anchor, that was imbedded into the stump. It was screwed down tight enough to keep the edge of the blade, firmly in place, but loose enough to be able to adjust the guide by tapping either end of the metal bar with the peening hammer. Such a simple solution to make it adjustable. I thought it was ingenious. Furthermore, he had a marvelous 500g anvil made by Peddinghaus. I later got to try out Niels' anvil and guide, and peened a blade with it. I was amazed by how relatively easy it was to peen with, compared to the Czech anvils from Scythe Supply that I had tried before. That, combined with how amazingly sharp all the freehand peened blades at this Symposium were, made me resolve to never go back to a peening jig again! My results were so good that even Ernst Schoiswohl, a master of peening on a flat anvil, (who later created the SFX anvil) was impressed. I asked Niels where a person could get one of those anvils. He said he was asked that a lot, and he had called Peddinghaus, and even all their distributors to find more, but they did not have them or make them anymore. Peter Vido later informed us that Picard made a similar premium 500g anvil, and soon thereafter the whole Scythe Network started to carry them. 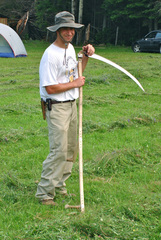 I also had the good fortune to befriend a Harvard educated engineer named Keith, at the Symposium. When the peening part of the symposium started, and all the instructors where at their stumps, at the same time, giving demonstrations, Keith and I happened to be closest to Niels. Niels started to demonstrate his technique to us, and Keith asked Niels great questions from an engineer's perspective, and Niels was so knowledgable that he could answer them, and I was able to get quite an education while just listening! I learned about the hardness of hammers and anvils and their radiuses, and various peening techniques. It was all foreign to me back then, but luckily Keith and I have maintained contact over the years, and he has given me great insights into metallurgy and peening. He also gave me feedback when I was writing my Peening Manual, and helped me with testing out my products. When I finally had some Picard anvils, I asked Keith if he remembered how Niels' peening guide was made. He said he did, but he had some changes in mind, and he would just make one for me quick, and send it to me. 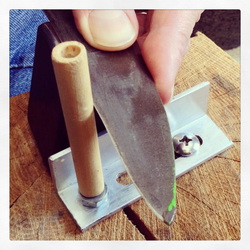 The main design change is that Keith thought it was better to place the screw on the far side of the anvil, so that when the blade is pressed against the roller, it can't swing out. This was especially important for me, since I use a diagonal drawing hammer strike, and I peen from tip to beard, instead of the traditional beard to tip. I explain why in my Peening Manual. Keith said the only problem with the guide that he sent me, was that he didn't have the equipment to truly center drill the dowel. He had tried to improvise but it didn't turn out well, and he ran out of time to fix it. I didn't have the equipment either, so later I asked Larry Cooper if he could make perfectly true, center-drilled dowel rollers in his shop. He thought about it, and then said that the thing to use would be some nylon rollers from a hardware store. They would roll true, and not dull your blade. So I went to my local hardware store and bought some nylon "spacers" as they are officially called, and tried them out. They worked! They were just awesome! They roll so true, you can't even feel them rolling. 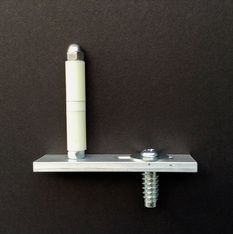 Next, I started trying to figure out how to mass produce them for my customers. The local hardware store referred me to a local machine shop. I called them up, and told them what I needed, and I was told they could have them ready in less than a week. So I spent many hours in hardware stores trying to come up with a design that I liked enough to pay a machine shop to do. Pictured on the left is what I finally came up with. I added a little more length, at both ends, so that it would be easier to reach with your hammer. It can be used on either side of your anvil. I think it's gorgeous. Like Scandinavian design. Sleek, simple, and effective. I hope you people enjoy using it, as much as I do. They really do help you peen a much more even line, with less hand strain. When the weather warms up here, I will also make a video on how to use it. Wow! What a long blog post for some nuts and bolts from a hardware store! Much ado about nothing? Wait 'til you peen with one. I think it's a winner. Next project? A 1SR Peening Bench would be nice! :) - Botan Anderson
3 Comments
6/23/2016 09:53:25 pm
you have provided a great information thanks for sharing , looking forward more
Reply
Benjamin Pimentel
4/29/2017 09:37:18 pm
Is the 1SR Peening Guide for sale? If so, how much does it cost?
Reply
Your comment will be posted after it is approved.
Leave a Reply. |
Botan AndersonArchives
March 2023
Categories
All
|


 RSS Feed