 Peening a scythe blade. Peening a scythe blade. The first Sunday of April has been officially dubbed International Peening Day, by the Scythe Association of the British Isles. The idea was originally conceived by Steve Tomlin, to encourage people to take the time to properly prepare their scythe blades for the upcoming mowing season. Even better is when people gather in small groups, to share their knowledge and experience. It falls on Easter this year, April 5th.1SR Scythe Instructor Andy Graybeal is hosting such an event in Coolville, Ohio. Andy will help those who need assistance getting their blade sharp. Starting at noon. Rain or shine. Contact Andy at [email protected], if you want to attend, or register on Facebook at https://www.facebook.com/events/928546020509355/ I will be hosting an event in Minnesota, near Hastings. Contact me at [email protected], or call 651-604-7090 if you wish to attend. Bring your scythe blade, whetstones, and whatever peening gear and stump you have. If you participating in the international event, either in groups or on your own, you are invited to share pictures with Steve Tomlin https://stevetomlincrafts.wordpress.com/2015/03/08/international-peening-day-2015/ - Botan Anderson
0 Comments
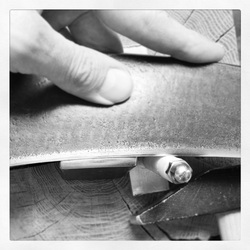
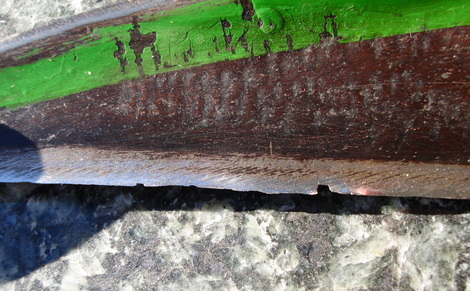
 Just got these peening guides back from our local machine shop. I spent many hours over the past couple of weeks, in hardware stores trying out all kinds of combinations of aluminum bars, and nuts, bolts, washers, and spacers, until I finally came up with a combination and design that worked. Then I had a local machine shop cut the aluminum pieces, router out the slots, drill and thread the screw hole, and chamfer all the edges. They did a beautiful job. The finished product is sleek, and works wonderfully. I sometimes peen scythe blades for local scythe people that don't want to peen their own. I see a lot of damaged edges doing this. Most damage occurs when the blade is dull and the owner compensates for that by swinging harder and chopping at the grass. The leverage on the tip of the blade from this force, often pushes the tang to the back of the ring, which opens up the tang angle all the way, and then the full force of the blow hits the edge of the blade straight on, instead of the acute shearing angle it was meant to. If the edge hits a rock straight on like this, you can cause considerable damage, as shown in the picture above. If you keep mowing with this kind of a crack, the crack can snag on an object, and increase the damage.
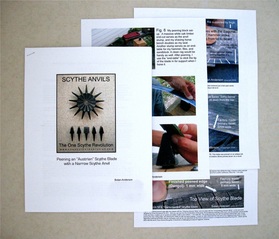 It has been suggested that I publish my 14 page peening manual, so that it could be reviewed. Well it is copyrighted, and I consider it desktop published, and a lot of people have them now. So if you are reading this post, and you have read my manual, please comment on it below. I was going for "crystal clear" step-by-step instructions, accompanied by macro photos, and links to my YouTube videos that illustrate the motions. If you have read it, please let me know how I did. "Übung macht den Meister." 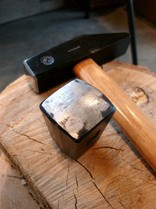 Freehand peening is much easier to learn, if you grew up using a hammer of some sort. I remember learning how to use a hammer as a young boy, from my Dad, and also from my neighbor who was a carpenter. It took a lot of practice for a young kid, to develop the hand-eye co-ordination necessary, to smoothly pound a nail straight into the wood, without missing the nail or damaging the wood. Whenever my Dad, or my neighbor was working on a carpentry project, I would be given some scrap wood, some nails, and an old hammer, to keep me busy and out of the way, but also to help me learn how. I was encouraged to practice. Learning how to use a hammer was considered an essential skill. However, that was back in the days before cordless drills, and pneumatic nail-guns. Now, even I seldom use a regular hammer, other than to occasionally hang pictures, or pound in fencing stakes. For most projects, I use screws and a cordless drill, because that way I can take it apart someday, and re-use all the materials. Cordless drills and pneumatic nail-guns have become so common place, that my local farm store recently put most of their nails on clearance. I still know how to use a hammer, however, and I assumed that everybody else does as well. It's such a simple skill. FAQ: When you peen a scythe blade, how do you know when you have peened the edge thin enough? Traditionally, a scythe blade's edge for cutting grass, was peened until the edge was thin enough to "run over the thumbnail". That is the edge would deflect when you pressed your thumbnail to it, and rocked it back and forth. This is kind of hard on the thumbnail, however. I prefer to use the cross-peen end of my peening hammer for that. I press the the hammer up against the edge, and slide it back and forth. In the video below you can see a moving shadow created by the running pressure from the cross-peen end of the hammer. For more information on how to peen a European scythe blade see my instruction page at https://www.onescytherevolution.com/peening.html In 2006 I attended the International Scythe Symposium, hosted by the Vido family on their farm in New Brunswick, Canada. The event was a delight for a photographer. I took a lot of pictures. I had posted some of them in the photo gallery on my farm website before, but in an awkward format. Since it's still winter here, and there's not a whole lot of mowing going on, I thought I'd revisit the Symposium with this blog, and re-post the pictures with the great multimedia features of this Wordpress blog. The slide show above is of the mowing workshops at the Symposium. Hope you enjoy it. Please comment and feel free to ask questions. I will add more text and photos over time.
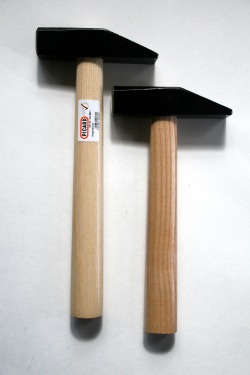 I've been meaning to write this all summer. Pictured here at left is a Picard combination scythe hammer, and a very nice little Peddinghaus combination scythe hammer. In my peening manual, I rave about what a great peening hammer the Picard Company makes. Excellent steel and hardness, and I like the camber of the hammer face and cross-peen better than the Peddinghaus. I received my first shipment of Picard hammers in 2007, and I picked out a hammer for myself, and sanded the face and the cross-peen smooth, with 320 and 400 grit wet/dry sandpaper. I've been using the same hammer ever since. 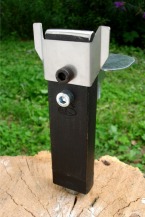 This is a new style of a narrow scythe anvil, designed by Ernst Schoiswohl for the Schroeckenfux Scythe Factory. It is now available in a tall model. It features an adjustable support platform that can now be mounted at two different levels, a guide for the edge of the blade, plus a precisely and expertly shaped normal radius on the anvil face. The anvil is made from extremely high quality steel, hardened to 58-60 Rockwell. It is available in both a short (10cm) and a tall (16cm) styles. Both styles that I carry have a normal radius. |
Botan AndersonArchives
March 2023
Categories
All
|
 RSS Feed